A Creative Way to Personalize Your World
Iron-on patches are more than a DIY project; they’re a statement of creativity and individuality. Whether you’re a fashion enthusiast, a small business owner, or someone who loves adding flair to their wardrobe, creating your iron-on patches is worth exploring. In this comprehensive guide, Custom Patches by Fineyst will take you through every detail of crafting professional-quality iron-on patches at home.
If you’re ready, How to Create Iron On Patches or make your designs shine or need premium patches, visit custompatches.us.com for expert assistance.
What Are Iron-On Patches and Why Are They Popular?
Iron-on patches are decorative or functional fabric pieces with heat-activated adhesive backing. They’re designed to stick onto clothing or accessories with just a household iron or heat press.
Why Create Iron-On Patches?
- Customization: Express your personality with unique designs.
- Branding: Add logos to uniforms or merchandise.
- Fashion Enhancement: Elevate plain clothing, hats, and denim with bold patches.
- Repair: Cover holes or stains stylishly.
Whether you’re crafting chenille patches, large iron-on patches, or iron-on embroidered patches wholesale, this guide will set you up for success.
Essential Materials for Making Iron-On Patches
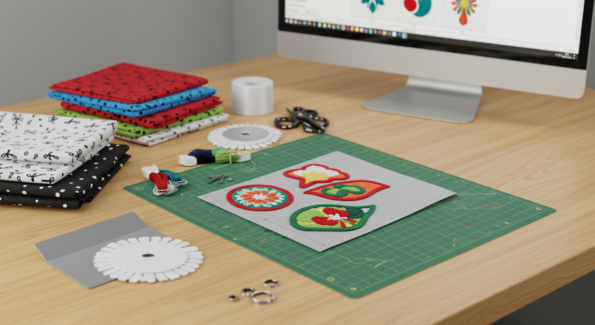
Gathering the right materials is key to achieving professional results. Here’s what you’ll need:
- Fabric Base: Durable fabrics like felt, twill, or denim.
- Embroidery Thread: High-quality thread for sharp designs.
- Cutting Machine: Cricut, Silhouette, or scissors for precision.
- Heat-Activated Adhesive: Fusible webbing or iron-on patch glue.
- Iron or Heat Press: A household iron or professional-grade heat press.
- Fray Check: To prevent fabric edges from unraveling.
- Design Software: Tools like Adobe Illustrator or Cricut Design Space.
Step-by-Step Process: How to Create Iron-On Patches
1. Design Your Patch

Your design is the foundation of a stunning patch. Consider these tips:
- Keep designs simple yet bold for easy readability.
- Use vibrant colors and high contrast for standout appeal.
- Ensure the design fits the patch’s intended size (e.g., 2-4 inches).
Pro Tip: If you need help perfecting your design, Custom Patches by Fineyst offers expert design services to bring your vision to life.
2. Prepare Your Materials

- Select a sturdy fabric base like twill or denim patches.
- Add a stabilizer to the back of the fabric for added support.
- Preheat your fabric to eliminate wrinkles and moisture.
3. Create the Patch Outline

Use a cutting machine or scissors to shape the patch. Circular, rectangular, or custom shapes all work, depending on your design preference.
4. Embroider Your Design

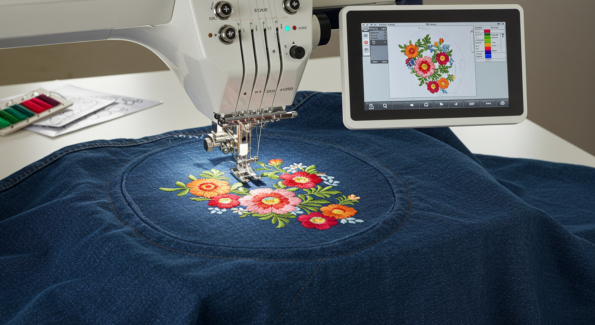
- Use an embroidery machine like the Babylock Valiant for precise stitching.
- If you don’t have a machine, hand embroidery works too.
- Test your embroidery on a scrap fabric before finalizing.
5. Apply Heat-Activated Adhesive

This step transforms your fabric into an iron-on patch:
- Cut the adhesive to match the patch size.
- Place it on the back of the patch, and use parchment paper to protect the fabric.
- Heat with an iron or heat press for 20-30 seconds until bonded.
6. Add Finishing Touches

- Trim the edges neatly.
- Use fray check to seal the edges and enhance durability.
7. Test and Apply

To attach the patch:
- Place it on the fabric surface.
- Cover with a cloth or parchment paper to prevent heat damage.
- Press with a hot iron for 30-45 seconds, applying firm, even pressure.
Pro Tips for Perfect Iron-On Patches
- Use high-quality materials for durability.
- Preheat your fabric before applying the patch.
- For heavy-duty applications, sew along the edges after ironing.
- Practice on scrap fabric to refine your technique.
Creative Uses for Iron-On Patches
- Iron-On Patches for Hats: Customize caps for sports teams or personal branding.
- Event Merch: Add logos to event merchandise for a professional touch.
- Repair and Reuse: Extend the life of old garments with stylish patches.
- Wholesale Opportunities: Create iron-on embroidered patches wholesale for organizations or businesses.
Troubleshooting: Common Issues and Fixes
Patch Won’t Stick
- Ensure the adhesive is fully activated with proper heat.
- Increase iron temperature or apply pressure evenly.
Edges Are Lifting
- Reapply heat and pressure.
- Add fabric adhesive if necessary.
Why Choose Custom Patches by Fineyst?
If you’re looking for top-notch custom patches, Custom Patches by Fineyst delivers unparalleled quality and expertise:
- Premium Fabrics: Durable, vibrant, and long-lasting.
- Customization Options: From chenille patches to large iron-on patches, we handle it all.
- Bulk Orders: Get wholesale patches at competitive prices.
- Expert Assistance: From design to delivery, we’re with you every step of the way.
Explore more at custompatches.us.com.
Conclusion: Your Creativity, Your Patch
Creating iron-on patches is a rewarding journey that combines art, functionality, and personalization. With the right tools and techniques, you can craft patches that showcase your individuality or brand. And if you need expert assistance, Custom Patches by Fineyst is your trusted partner for professional-grade patches.
Take the First Step Today
- Share your patch designs on social media and tag us @CustomPatchesByFineyst.
- Visit custompatches.us.com for custom patch services.
- Start crafting and let your imagination soar!
FAQ’S
Can you make your iron-on patches?
Yes! You can create iron-on patches using fabric, embroidery, or printable transfer paper with adhesive backing.
How to make your iron-ons?
Design your patch, cut it out, apply iron-on adhesive, and press with an iron for 30-45 seconds.
What machine do you need to make iron-on patches?
You can use an embroidery machine, Cricut, or a sewing machine for precise and durable patches.
What fabric do you use to make iron-on patches?
Twill, felt, and cotton work best for iron-on patches as they hold adhesive well.
How to make iron-on patches by hand?
Draw or print your design on fabric, apply fusible webbing, cut it out, and press with an iron.
How to make an iron-on patch from a picture?
Print your image on transfer paper, cut it out, and iron it onto fabric using heat.
How to create iron-on patches without sewing?
Use fusible webbing or fabric glue to attach the patch without stitching.
How to create iron-on patches on fabric?
Cut fabric, apply iron-on adhesive, and press it onto your garment with heat.
How to make an iron-on patch with an embroidery machine?
Embroider your design, cut the patch, apply adhesive backing, and heat-press it onto fabric.
DIY iron-on patches with paper
Print your design on transfer paper, cut it out, and iron it onto fabric.
How to make iron-on patches with Cricut?
Use Cricut to cut fabric, apply iron-on adhesive, and press onto fabric with heat.
How to make patches by hand?
Draw or paint your design on fabric, cut it out, seal the edges, and use adhesive backing.


